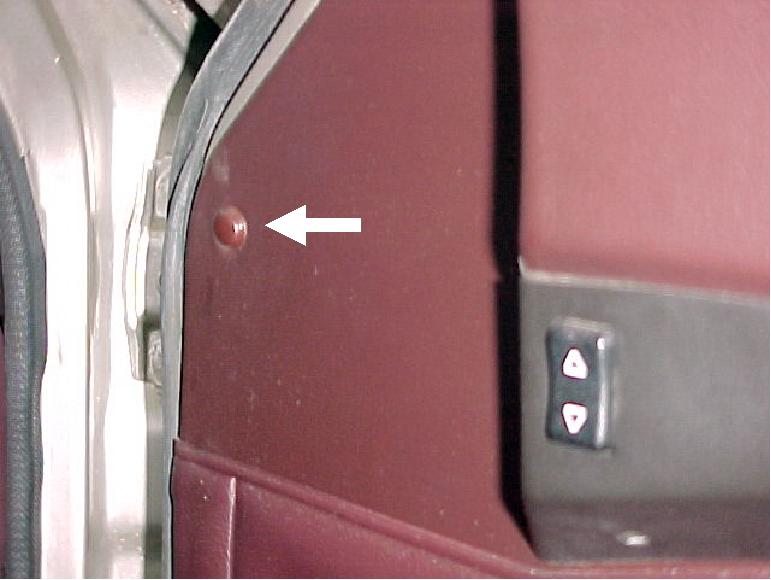
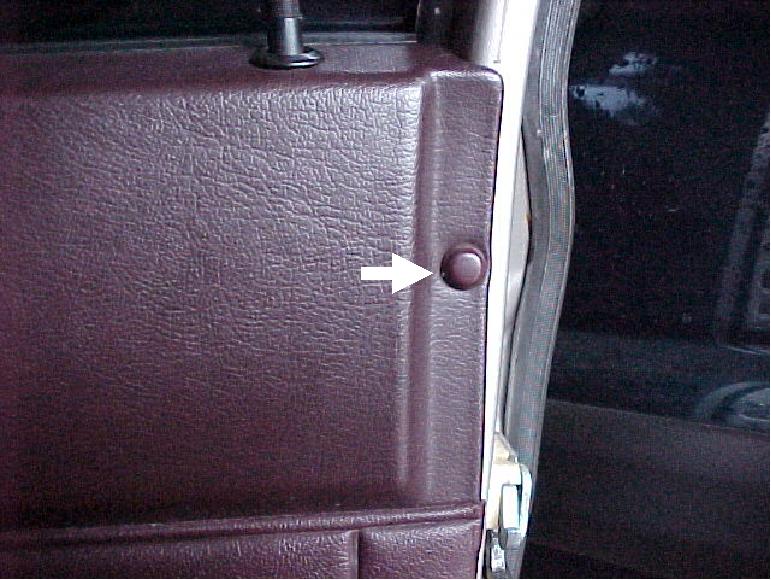
Near the top of the door panel (front and rear), you'll find two Phillips head screws. The screws are located behind plastic covers. Using a small probe or small flat tip screwdriver, pry off the plastic cover. Then, using a Phillips head screwdriver remove the screws. (See pictures below)
Using a Phillips head screwdriver, remove the speaker grill from the door panel.
If the vehicle is equipped with manual windows, remove the window crank handles.
Remove the Phillips head screws along the bottom edge and at the front of the door pocket. When the screws are removed, you'll be able to slide the pocket downward to remove it from the vehicle.
When the door pocket is removed, you'll find a plastic mounting block at the front of the door panel for the front door pocket screw. Using a Phillips screwdriver, remove the plastic mounting block.
Pull out on the interior door handle as if you were opening the door. Behind the handle you'll find a Phillips head screw which must be removed. This is a rather awkward operation and caution should be used to prevent damaging the door handle.
Using a Phillips head screwdriver, remove the three screws underneath the door arm rest. These screws are threaded into the door at approximately a 45° angle.
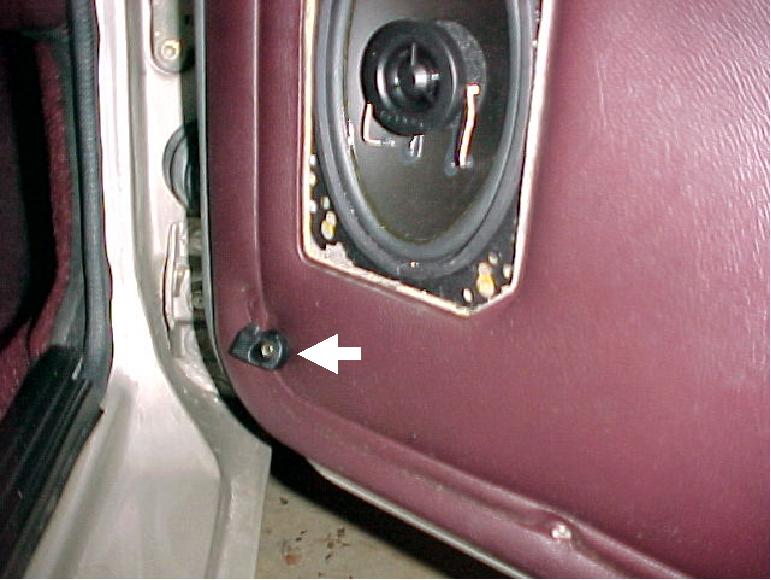
Along the back rear corner of the door panel, there are several plastic push plugs mounted to the back of the door panel. Loosen those from the door by lifting up on the back edge of the door panel and prying the plugs loose using the door panel tool. Use of the door panel tool is not mandatory. This can be done with a flat tip screwdriver. However, the door panel tool helps prevent damaging the plugs or ripping them out of the back of the door panel.
All of the door panel retaining hardware has now been removed. The door panel is held in place (actually hung on the door) by a tab on the back of the panel which insert into a slot in the door. To remove lift up on the panel until the tab slides out of the slot in the door and the panel is clear of the lock button at the top of the door.
If the vehicle is equipped with electric windows, disconnect the electrical connector plug(s) for the window switch. Use extreme caution when disconnecting the plugs. There are two plastic locking tabs at both the top and bottom of the switch which are very easy to break. I've found that the best method for removing these is to slide a small flat tip screwdriver underneath both tabs on one side of the plug. Then lift up on the screwdriver enough to disengage the tabs and pull back on that side of the plug enough to keep the tabs disengaged. Then move to the other side and repeat.